
Leather bag strap. There’s a certain undeniable allure to a well-loved leather bag. It’s more than just an accessory; it’s a companion on countless adventures, a keeper of secrets, and a testament to enduring style. But even the most robust leather, over time, can show signs of wear, and often, the first casualty is the strap. A torn, frayed, or broken strap can transform your beloved carryall from a practical everyday item into a forgotten relic in the back of your closet.
But don’t despair! Before you relegate your cherished leather bag to the fashion graveyard, know that many strap issues are surprisingly fixable. With a little patience, the right tools, and some helpful guidance, you can breathe new life into your bag, saving money and preserving the sentimental value it holds.
This comprehensive guide will walk you through everything you need to know about repairing a leather bag strap, from identifying the problem to executing the perfect fix. We’ll cover common strap ailments, essential tools, step-by-step leather bag strap repair processes, and even tips for preventative care.
Why Do Leather Bag Straps Break? Understanding the Culprits
Before we dive into the “how-to,” let’s understand “why.” Knowing the common causes of strap damage can help you prevent future issues and choose the most effective repair method.
- Excessive Weight: Consistently overloading your bag puts immense strain on the straps and their attachment points. This is perhaps the most common culprit.
- Wear and Tear: Over time, friction from daily use, rubbing against clothing, and exposure to the elements can cause the leather to thin, crack, or fray.
- Poor Quality Leather or Hardware: Not all leather is created equal. Lower-quality leather or flimsy hardware (buckles, rings, clasps) are more prone to breakage.
- Dried Out Leather: Leather is a natural material that needs moisture to remain supple. If not conditioned regularly, it can become brittle and crack.
- Improper Storage: Storing your bag in damp or excessively dry conditions can damage the leather. Folding or creasing straps for long periods can also weaken them.
- Accidental Snags or Cuts: Sharp objects or accidental tugs can cause sudden tears or rips in the leather.
Essential Tools for Your Leather Strap Repair Toolkit
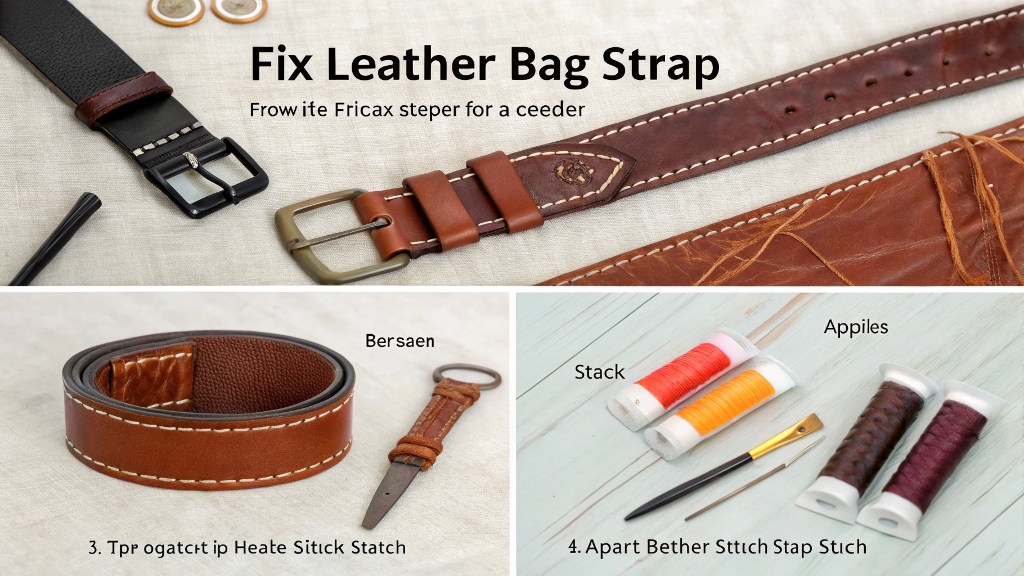
Before you embark on your leather bag strap mission, gather your supplies. Having the right tools will make the process smoother and ensure a professional-looking finish.
- Leather Adhesive/Glue:
- Barge Cement: A strong, flexible contact cement often favored by leather crafters for its durability.
- Leather Glue (e.g., Fiebing’s Leathercraft Cement): Specifically formulated for leather, offering a strong bond.
- Super Glue (use sparingly for small tears): Can be brittle, so not ideal for high-stress areas.
- Leather Needles: Strong, triangular-pointed needles designed to pierce leather.
- Strong Thread:
- Waxed Polyester Thread: Durable, rot-resistant, and glides through leather easily.
- Nylon Thread: Another strong option.
- Leather Punch: For creating new holes for stitching or hardware. (Rotary punches are very versatile.)
- Mallet or Hammer: For use with a leather punch or setting rivets.
- Utility Knife or X-Acto Knife: For clean cuts.
- Cutting Mat: Protects your work surface.
- Leather Conditioner/Oil: To rehydrate and protect the leather.
- Clamps or Binder Clips: To hold pieces in place while the glue dries.
- Measuring Tape or Ruler: For accurate measurements.
- Optional Hardware: D-rings, buckles, rivets, Chicago screws (if replacing or reinforcing attachments).
- Awl: For marking holes or making small pilot holes.
- Sandpaper (fine-grit): For smoothing edges.
- Rubbing Alcohol or Deglazer: To clean leather before gluing.
Common Leather Strap Issues and Their Solutions
Now, let’s tackle the specific problems you might encounter and the best ways to fix the leather bag strap.
-
Frayed or Worn Edges
- Problem: The edges of your strap are looking ragged, exposing the inner fibers of the leather. This is common due to friction.
- Solution:
- Clean the Edges: Gently clean the frayed area with a damp cloth.
- Trim Loose Fibers: Carefully trim any excessively long or loose fibers with sharp scissors or an X-Acto knife. Be precise.
- Apply Edge Paint/Dye (Optional but Recommended): For a professional finish, apply a specialized leather edge paint. This seals the edges and prevents further fraying. Apply in thin coats, allowing each to dry before applying the next.
- Burnishing (Traditional Method): If your strap is vegetable-tanned leather, you can burnish the edges. Apply a small amount of water or a specialized burnishing compound to the edge, then rub vigorously with a smooth, hard object (like a canvas cloth, a wooden slicker, or even a bone folder) until the edge becomes smooth and shiny. This compacts the fibers.
-
Small Tears or Cracks in the Leather
- Problem: Superficial cracks or small tears in the body of the strap, not extending through the entire thickness.
- Solution:
- Clean the Area: Wipe the affected area with rubbing alcohol or a leather deglazer to remove any oils or dirt. Allow to dry.
- Apply Leather Adhesive: Using a small, precise applicator (like a toothpick or a cotton swab), carefully apply a thin layer of leather glue or Barge cement into the crack or tear.
- Press and Hold: Gently press the edges of the tear together. If possible, use clamps or binder clips to hold the area firmly while the glue dries. Place a piece of plastic wrap or wax paper between the clamp and the leather to prevent sticking.
- Cure Time: Allow the glue to cure completely according to the manufacturer’s instructions (usually 24 hours).
- Condition: Once dry, apply a leather conditioner to rehydrate the area and improve its flexibility.
-
Broken Stitching
- Problem: The stitching holding two pieces of leather together (e.g., at the buckle, near a D-ring, or where a strap is folded) has come undone.
- Solution:
- Remove Old Thread: Carefully remove all remnants of the old, broken thread using an awl or a seam ripper.
- Prepare New Thread: Cut a length of strong waxed polyester or nylon thread. For double-needle stitching, cut it approximately 3-4 times the length of the section you need to sew.
- Re-stitch:
- Option A: Re-use Existing Holes: This is ideal if the leather itself isn’t damaged. Use an awl to re-open the existing stitch holes if they are collapsed. Then, using two leather needles (one for each end of your thread), perform a saddle stitch (a very strong hand-sewing technique where two needles pass through each hole from opposite directions).
- Option B: Punch New Holes (if leather is torn around old holes): If the old holes are compromised, you might need to punch a new line of holes parallel to the original, slightly offset. Ensure consistent spacing.
- Knot and Finish: Securely knot the ends of your thread. For a clean finish, you can melt the ends of synthetic thread slightly with a lighter (briefly!) to prevent fraying, or tuck them between layers of leather.
-
Detached or Broken Hardware (D-Rings, Buckles, Clasps)
- Problem: The metal hardware connecting the strap to the bag has broken, bent, or completely detached.
- Solution:
- Source New Hardware: Purchase replacement hardware of the same size and type. Measure the width of your strap to ensure a proper fit. Look for durable, solid metal options.
- Remove Old Hardware: Carefully cut or pry away the old, broken hardware.
- Attach New Hardware:
- If sewn: Slide the new hardware into place. If the original attachment was sewn, re-stitch it using the broken stitching method described above. You may need to punch new holes if the old ones are damaged.
- If riveted: If the original attachment used rivets, you’ll need a rivet setter and new rivets. Punch new holes for the rivets (or use existing ones if they’re intact) and set the new hardware firmly.
- If Chicago Screws: These are easy to replace. Simply unscrew the old ones and screw in the new ones, securing the hardware.
- Reinforce (Optional): If the attachment point seems weak, consider adding an extra layer of leather underneath the hardware or using more rivets/stitching for added strength.
-
Strap has Completely Snapped/Torn in Half
- Problem: Your strap has broken cleanly in two, or a large section is missing.
- Solution: This is the most challenging repair and may require more advanced techniques or professional help.
- Option A: Splice with an Overlay:
- Trim Evenly: Trim both broken ends of the strap cleanly and evenly.
- Cut a Patch: Cut a new piece of matching leather that is slightly wider and at least 4-6 inches longer than the break. This will be your reinforcing patch.
- Glue and Stitch: Apply leather adhesive to both the patch and the trimmed strap ends. Carefully align the patch over the broken area, ensuring even overlap on both sides. Clamp firmly and allow to dry. Once dry, stitch all around the edges of the patch for maximum strength and a decorative finish. You can use a contrasting thread for an aesthetic touch.
- Option B: Replace the Entire Strap: If the damage is extensive, the leather is very old and brittle, or you prefer a completely fresh look, replacing the entire strap might be the best option. You can buy pre-made leather straps or purchase a length of leather and make your own (which offers more customization). This often involves attaching the new strap to the existing hardware or purchasing new hardware.
- Option A: Splice with an Overlay:
Tips for Long-Term Strap Health & Prevention
Repairing your strap is a victory, but preventing future damage is even better.
- Don’t Overload: Be mindful of the weight you put in your bag. Distribute heavy items evenly.
- Regular Conditioning: Leather needs moisture. Condition your bag, especially the straps, every 3-6 months with a good quality leather conditioner. This keeps the leather supple and prevents drying and cracking.
- Clean Regularly: Wipe down your bag with a damp cloth to remove dirt and grime.
- Proper Storage: When not in use, stuff your bag with tissue paper or bubble wrap to maintain its shape. Store it in a dust bag in a cool, dry place, away from direct sunlight and extreme temperatures. Avoid folding or creasing straps for long periods.
- Rotate Bags: If you have multiple bags, rotate their use to reduce wear and tear on any single item.
- Inspect Regularly: Periodically inspect your strap for early signs of wear, like fraying or small cracks. Addressing these early can prevent major damage.
When to Seek Professional Help
While many strap repairs are DIY-friendly, there are times when it’s best to call in the experts:
- Exotic Leathers: If your bag is made from exotic leather (alligator, ostrich, etc.), these require specialized repair techniques.
- Extensive Damage: If the entire strap is crumbling, or the repair seems beyond your skill level.
- Sentimental or High-Value Bags: For designer bags or those with significant sentimental value, a professional can ensure the repair is done correctly and maintains the bag’s integrity.
- Complex Structural Issues: If the damage extends to the bag’s body or involves intricate construction.
Read More Also: The Best-Selling Michael Kors Handbags on Amazon USA
Conclusion
A broken leather bag strap doesn’t have to signal the end for your cherished accessory. With the right approach and a little effort, you can often restore your bag to its former glory, allowing it to continue accompanying you on life’s adventures. By understanding the causes of damage, equipping yourself with the necessary tools, and following these detailed repair instructions, you’ll not only save money but also gain the satisfaction of giving new life to a beloved item. So, roll up your sleeves, gather your supplies, and get ready to revive your favorite carryall!
Discover More: Best Gifts for Long-Distance Siblings